|
Cushcraft R5 ˝ λ Vertical |
Maintenance and Repair |
|
CUSHCRAFT R5 (10/12/15/17/20 m)
Cushcraft have
made many vertical antennas; R4, R5, R6, R6000, R7, R7000, R8 etc. All
are ˝ wave radiators with 4 or shorter base-load rods. Those "radials"
are in fact a top hat capacitance. The quality of the R6 successors
decreased, see Product Reviews on www.eham.com.
The 17ft half wave vertical is covering the 10,
12, 15, 17, and 20m amateur bands. The antenna does not require
traditional ground radials, so no need for unsightly radials and is so
light a normal scaffold pole would be ideal to mount the antenna.
POWER
The
manual states that this shortened half wave radiator is suited for 1.8
kW pep power and that is remarkable for this type of 5 m-tall antenna.
The vertical passed a test with a borrowed 1.5 kW amplifier with no-ill
effect. There were no signs of failure on the traps or matching unit. |

R5 a 5 band vertical on top of a 12 m mast. |
PRACTICAL TESTS
The R5 is
mounted on a 12 m mast. My 2 el. Yagi only outperforms this antenna if
the beam is pointed to the station. The difference is very noticeable in
SSB/CW DX pile-ups, but if I can hear them I can work them. It provides
useful DX performance. I did comparisons with my open wire fed inverted
V W3DZZ and on 20 m: R5 = W3DZZ at 1500 km. On all bands beyond 1500 km
the signal strength is about 1 S unit better than the W3DZZ.
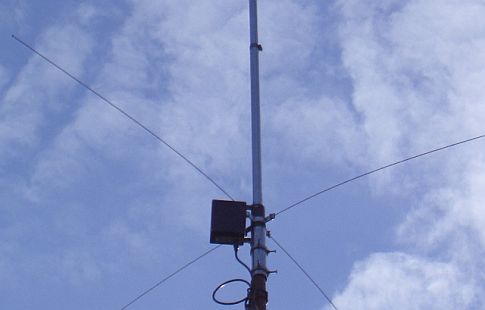
This antenna is very usable and, being asymmetrically
fed, with no radials and only 4 × 1.24 m stainless steel whips («fig)
is attractive for apartment dwellers. All hardware is aluminium or
stainless steel. The aluminium durability is good but not as good as
Fritzel's tubing. It has withstood many heavy windstorms without a
problem and currently is bent over at about a 10 – 15 degree angle. It
is rugged and not too tall mounting without guy ropes. This antenna is
sensitive to metal objects in near field. Prevent installation over a
metal roof or near out other antennas because they will detune the R5
considerably.
INSULATOR
|
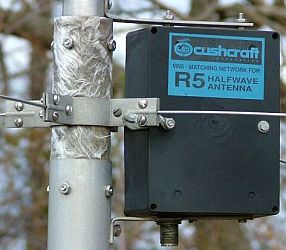
Fig a: A bare weather beaten insulator. |
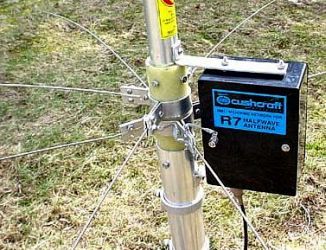
Fig b: An unprotected new R7 insulator. |
The fibreglass base insulator (fig a) is a
polyester-coated tube. The polyester surface has the tendency to
"evaporate" and the bare glass fibres then are like a sponge attracting
absorbing dirt and moisture.
|

"Bumper" spray
The
insulator was "painted" with layers of 2 component polyester resin and
sprayed (fig») with "bumper spray", a black non-metallic spray paint. It
prevents the deterioration of the polyester. |

Insulator protected with black non-metallic spray paint. |
MATCHING UNIT

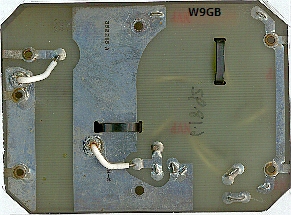
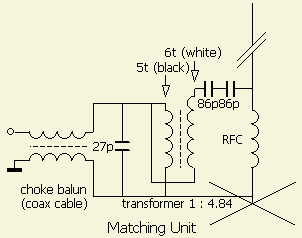
L to R: choke balun (brown colour wire) and 1 : 4.84 auto transformer (black and white colour wire).
On several
homepages the transformer is called a 1 : 4 balun. That is contrary to
the print design. On the auto transformer are 5 black turns and 6 white
turns through the toroid. So the transformer step up ratio is 5 : (5 +
6) and that is an 5˛ : 11˛ = 1 : 4.84 impedance ratio. All matching
units' shows equally designed print boards.

I replaced the two 86 pF caps in series with a single transmitting high current 47 pF doorknob type.

This happens if one use the antenna with an ATU and a lot of power on more than the specified 5 bands!
MAINTENANCE
The traps
should be carefully loosened and the contact area and all other
aluminium hardware should be cleaned with Brillo pads (steel wool
impregnated with soap).
COIL
|

Water got inside a trap due to cracked heath shrink tubing.

Cleaned and repaired coil |
I have been using my
2ndhand R5 for more than two years and then some problems arose. The SWR
was varying and increased on some bands. I took the antenna down and it
turns out that water got inside a trap because cracked heath shrink
tubing and a split in the joint between the coil former (force-fit?)
into the aluminium tube. The heath shrink tubing was carefully removed
and the coil, covered with "transparent contact adhesive", was cleaned
with thinner.
Once clean, the split should be filled with epoxy
glue (2-part polyurethane adhesive), the coil buttered with transparent
contact adhesive and reassembled with heath shrink tubing. The process
with the transparent adhesive is for preventing that water gets inside
the trap.

Leaking spots are the heath shrinks tubing over the bolt onto the connection of the coil former with the tube.
CAPACITOR

The
capacitors paralleling the sealed coils are coaxial types with a rod, a
tube and a dielectric tubing in between. One end is sealed with heath
shrink tubing and the other end is protected with a cap.

One capacitor failed because of a burst cap and water
get into the coaxial system. This changed the dielectric constant of
the capacitor, thus moving the resonant frequency, and the SWR increased
dramatically. Flash-overs when running high power shorted the wet
capacitor out and evaporated a part of the insulating tubing.

This was replaced with a short piece of PTFE tubing
and all of the components were dried, cleaned and reassembled with
contact cement and heath shrink tubing.

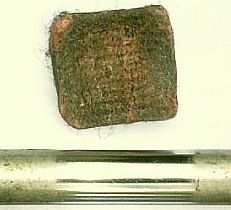
It seems that glue sticks («fig) for a glue gun are suitable for replacement of the insulating tubes.

All caps are replaced with («fig) rugged caps.
|
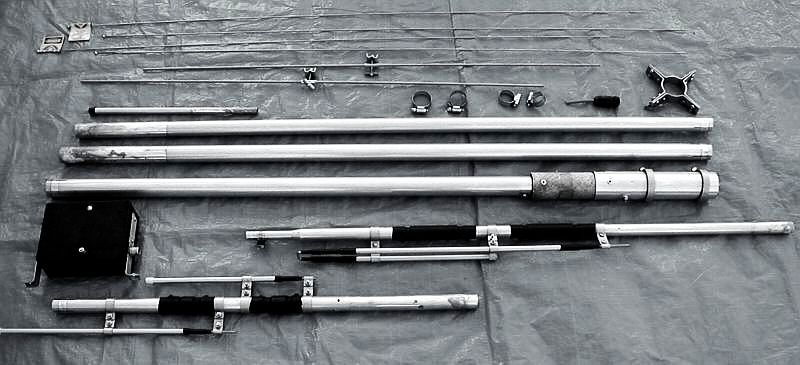
All R5 parts of the 1989 model. |
Measuring the traps is
only possible by comparison with another R5. Make sure that you do not
touch any part of the antenna and vary the frequency of a (grid) dipper
meter until a strong dip is seen. Move the meter away while retuning
until a very shallow dip is seen. Take note of the trap frequency.
Repeat this process with the repaired R5.
RADIATOR DIMENSIONS

The assembly and installation manuals of 3/1989 and 10/1989 show different dimensions for the radiator.
With
the antenna on a 2 m mast I measured the SWR, on each band with a half
wave (or multiple) 50 Ω cable for that band between the feeder point and
an analyser. I found the dimensions in the schematic by varying the
sections to match the specifications for SWR ~ 1
|
Back on a 12 m mast the R5 performs by ˝ – 1 S unit better (75% of the QSO's) than the inverted V W3DZZ. |
MHz |
14.200 |
18.100 |
21.400 |
24.950 |
29.500 |
|
With a 12.5 m 50 Ω coax cable feeder line the SWR was: |
SWR |
1 |
1 |
1.3 |
1 |
1.1 |
NOTE: 2 TYPES OF TRAPS FOR 15 m and 17 m
|

Combined 15/17 m trap March 1989 |

15 + 17 m traps October 1989 |
WOBBLED ANTENNA
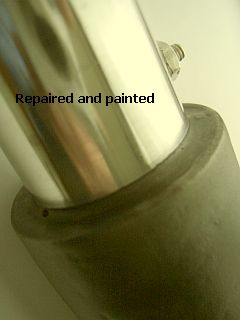
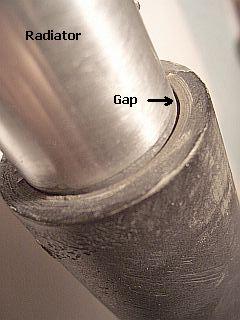
The antenna wobbled due
to the gap caused by evaporation of the polyester. The tube was removed,
the inside of the insulator applied with layers of 2 component
polyester resin until a minimum variation of fit. Then I sanded the
insulator for a perfect cylindrically curved shape and applied the last
layer and placed the antenna back in the insulator. In fact the
insulator was restructured to its original diameter.
I used a polyester repair set (for automobile) and
applied the 2 component polyester resin with a brush. Eventually fill
holes with fibreglass. The 2 component polyester resin can be used in
combination with fibreglass mat and fibreglass thin film to fill holes
in surfaces of steel, aluminium, wood, concrete and polyester. Polyester
resin is elastic and resistant to chemicals and weather influences and
is, after hardening only sand smooth mechanically.

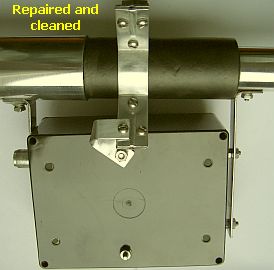
Due to the gap the antenna wobbled and one of the straps was broken.
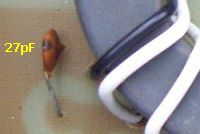
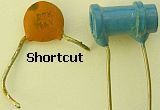
I replaced a shortcut 27 pF cap with 4 × ceramic tube caps in series/parallel.
Greg, W9GB found a potential replacement source for damaged MN-7 black enclosures.
http://www.electronicsurplus.com/commerce/catalog/product.jsp?product_id=69167&czuid=1195158651593
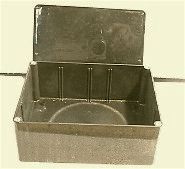
He wrote: "I have found the a black plastic case
(fig») that is identical to the MN-7 Matching Network enclosure used by
Cushcraft. It appears that Cushcraft used the Polycase "EP" series, EP-8
model. The POLYCASE® EP-8 size is identical
and injection mouldings from the dies are identical in every detail to
my MN-7 (1992). I do not think Polycase makes the "EP" series currently.
These EP-8 boxes are now surplus NOS from Electronic Surplus, Inc.
(ESI) in Cleveland. OH. ESI had 441 in stock at $ 4.50 USD each -- I
just received 3 to confirm match".
ATU
|

|

|
|
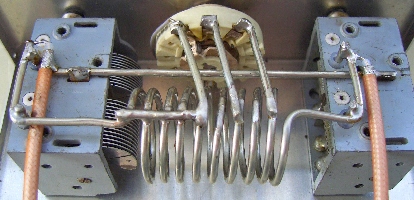
Incidentally, I use an easy to build pi-ATU to always ensure that the transceiver is loaded with a SWR = 1. |
